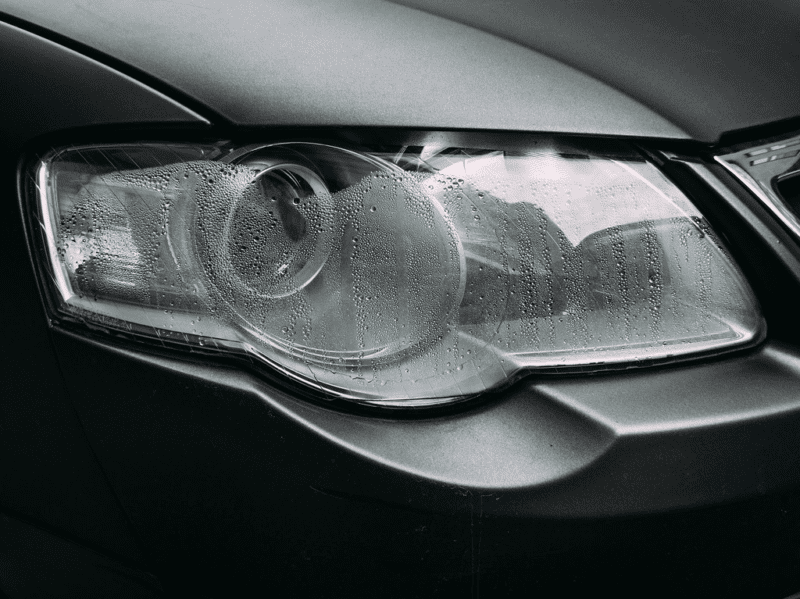

Moist Headlights: Tips for Clearer and Safer Nighttime Driving
Moist Headlights can have a significant impact on your driving experience, especially during the night. Whether it’s caused by a compromised seal or condensation buildup, dealing with trapped moisture is crucial for maintaining optimal visibility and safety on the road.
Shedding Light on the Dangers of Trapped Moisture
Trapped moisture in your headlight casing isn’t just a minor annoyance – it can pose real dangers for nighttime driving. Similar to how debris and fog on the outside of the headlight casing can hinder visibility, moisture inside the seal can lead to dimmed lights and even create hazardous blind spots.
Understanding the Consequences: Moist Headlights and Vehicle Inspection
In certain states, passing your vehicle inspection hinges on the condition of your headlights. Moist Headlights, often a result of trapped moisture, can lead to inspection failures. This moisture might infiltrate through a compromised seal around the headlight, allowing water to accumulate behind the lens. Alternatively, moist air can cause condensation to form on the inside of the lens when the headlight is turned on and off, impacting visibility.
Steps to Combat Moisture Buildup: Enhancing Visibility and Safety
Addressing moisture-related issues in your headlights is crucial. Here are actionable steps to help you maintain clear and safe visibility:
1. Resolving Minor Condensation Issues
If you notice slight condensation in your headlight, there are simple methods to tackle the problem without breaking the seal. Breaking the seal should be avoided unless you’re confident in resealing it afterward. First, check and clear any blockage in the headlight housing vent. Often, debris or spider webs can obstruct proper ventilation. Gently clean the vent or blow it out using compressed air to prevent condensation.
2. Dealing with Major Condensation Challenges
For more substantial condensation issues, a more involved approach is necessary. Begin by removing the headlight unit as per your vehicle’s service manual. Use a hairdryer to introduce warm, dry air into the vent or outside the headlight unit to aid in moisture evaporation. Afterward, allow the unit to cool down to assess the effectiveness of this method.

For a comprehensive solution, you might need to remove the seal and the headlight cover. Use tools like sockets and screwdrivers, silica gel packs, a lint-free cloth, and sealant. Thoroughly dry the interior and utilize silica gel packs to absorb the remaining moisture. Take care during reassembly to ensure a strong seal.
Also read :5 Steps To Diagnose And Fix Car’s Low AC Cooling: Expert Tips And Advice – TheAutoEngineer.com
3. Ensuring Ongoing Moisture Prevention
Preventing future moisture buildup is essential. Inspect and repair damaged seals or replace them if needed. Protect O-rings with silicone spray and use silicone sealant gel for any necessary repairs. When reinstalling the headlight, verify proper alignment, bracket placement, and electrical connections. Regularly inspect both headlights to catch and address issues promptly.

Conclusion: Illuminating the Path to Clearer Nighttime Journeys
While addressing moisture in headlights can be a meticulous process, the rewards are worth it – improved visibility, enhanced safety, and potential cost savings. Remember, monitoring both headlights is essential, as issues often affect both. If moisture-related problems persist, consider exploring headlight assembly replacement options with the guidance of professionals. Illuminate your path and drive safely, day or night.
“The road ahead is clearer when we shed light on the challenges that obstruct our way.”
3 Causes of Moisture in Headlights (and How to Fix the Problem) (cartreatments.com)
